Showing posts with label kokeshi. Show all posts

Monday, March 14, 2016

Happy 13th to My B Girl!

Happy Birthday my sweet and strong B!


They say parents can determine their child’s personality within the first month of life. As a mother of three, I have found this to be true. I remember when B was a month old, as soon as the sun went down, her mood seemed to shift as well. She would cry incessantly for upto an hour, and no amount of cuddling, rocking, feeding, playing could distract her high-pitched cries. The doctor said that she developed colic and it would soon go away on its own. But for months on end, I was stressed from her screaming.

Thursday, January 17, 2013

Bento Mom

Back to school after the long Christmas break is usually an effort for me... back to waking up early to help the kids get ready for school, back to helping the youngest one with his lessons, and back to thinking of what to prepare for their lunch baon.

But for one of my mommy friends, back to school means that she is back as the resident cool mom, as far as her kids and their lunch-mates are concerned.  You see since the last quarter of 2012, she has been churning out one creative bento lunch after another.  Her kids have been the star of the school cafeteria, and even the lunch teachers have been looking forward to the daily bento creations.
I have known Che for as long as my youngest has started pre-nursery.  We started out as co-parents and started talking, along with the rest of the other moms, as we waited for our kids to get dismissed. When our kids moved on to different big schools, we kept in touch with occasional breakfast dates, and our group's annual dice game and Christmas party.  

This mom is as gorgeous as her bento box creations.  And of course, her "hard work" pays off as she sees her kids' lunch box wiped clean at the end of the day.  To complete her happiness, the creative bento lunches have also encouraged her daughters to try a wide variety of foods that they would otherwise have turned their noses up: fresh lettuce, uncooked carrots, cucumber slices that serve as garnish for the bentos are now being eaten - without any fuss.  And that, for her, makes all the effort worth it!

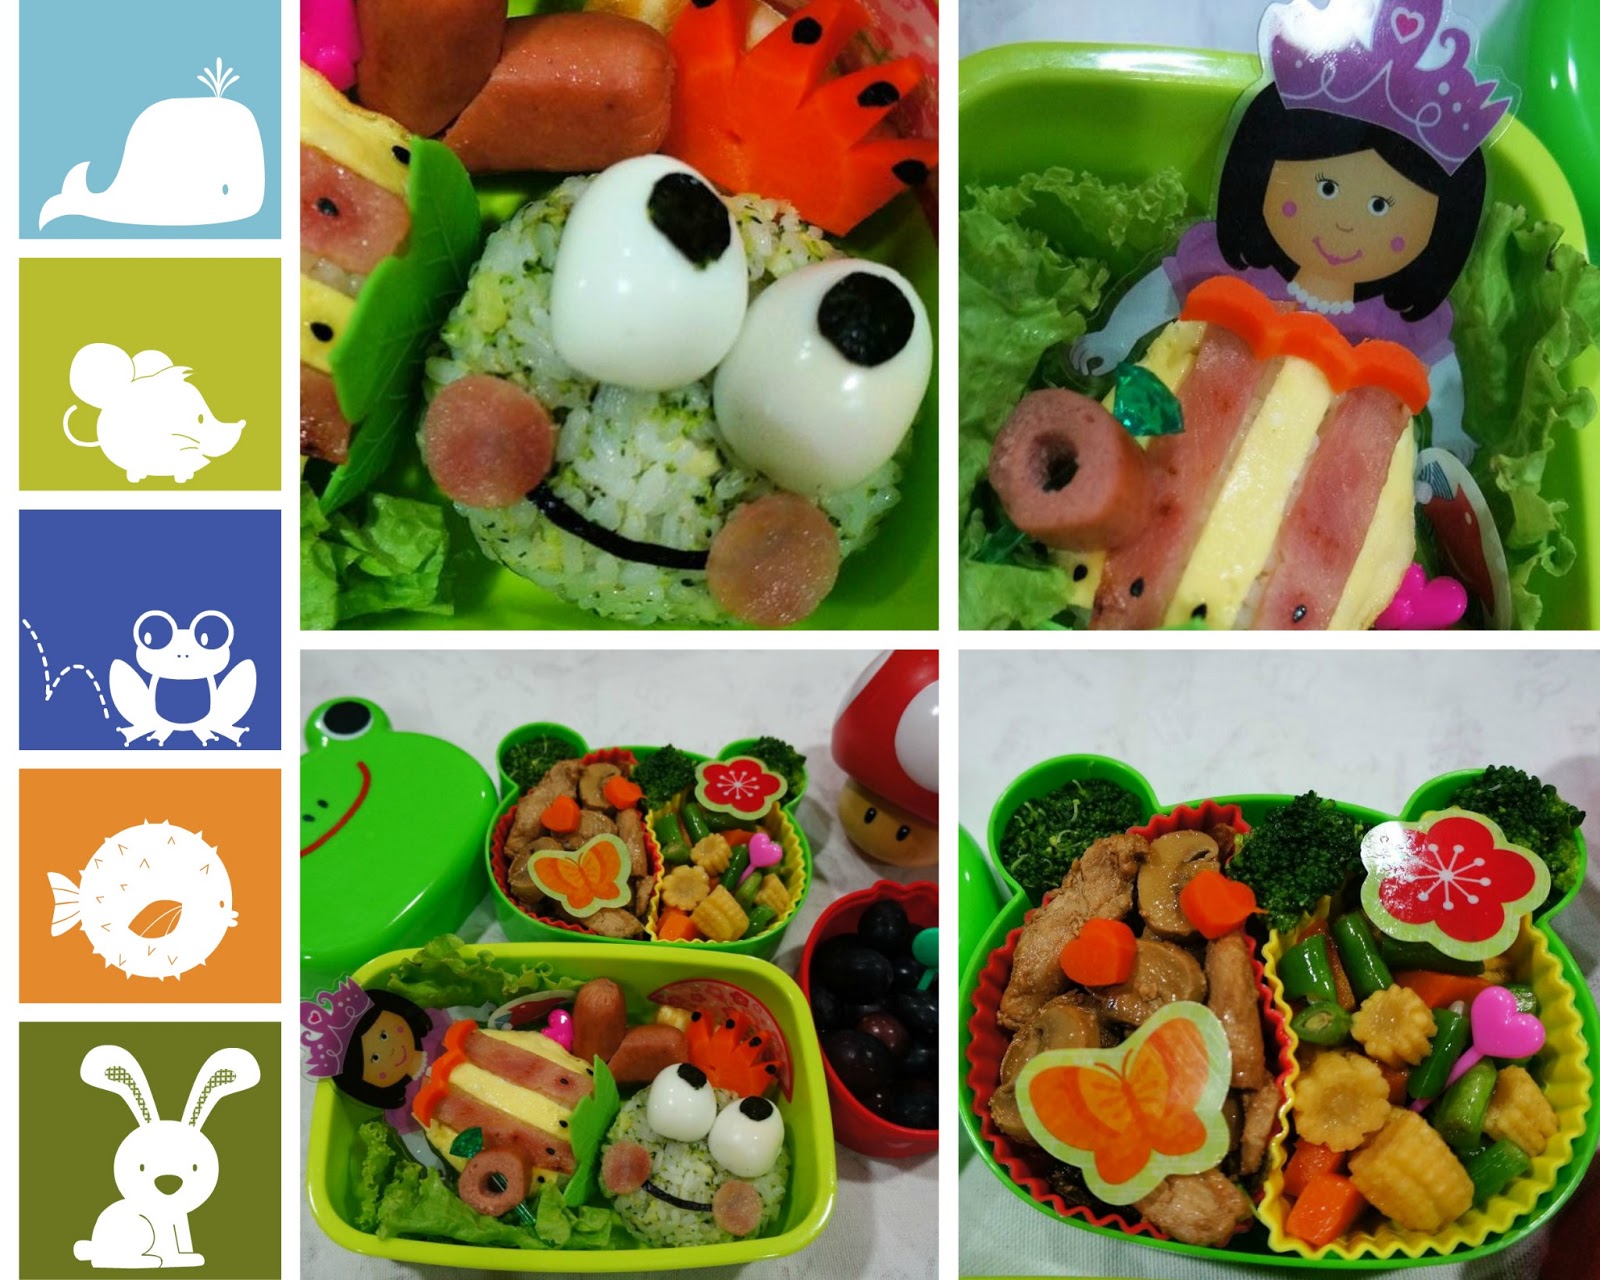
Here are some samples of her creations, there are a lot more posted  on her Facebook wall.
And one of my favorites... the Japanese girls.

Here is a short Q & A with Che:
 
1) How long have you been doing bento lunches? What made you start in the first place?
 - I started doing bento lunches just recently, sometime September this year. I was prompted to try it when I saw a post from my friend in Cebu who was creating bento lunches for her kids. They were really cute and healthy. So I told myself, maybe I can do it for the kids too.
 

2.) How long is your prep time? How does the entire process go? Any tips to speed things up?
 - It takes me about an hour and a half to make two sets. A longer time would be ideal so you can enjoy making it. Haha! I start at 4AM and I end or have to end at 5:30 since I have to wake the kids up and give my little one a bath. I usually begin by steaming the rice early. While it is in the cooker, I cook all the other food like the meat and the veggies. I also boil the carrots and fry the eggs, which I mostly use to decorate my bento. When the rice is cooked and cooled, I mould them using a rice mould or with a cling film in whatever animal or character I have for my design.  

- To speed things up, I usually boil the eggs the night before if I need them for the bento. I just warm them on top of my steaming rice in the morning. Sometimes, I pre-cut hard designs at night and stick them on cling film like the ninja’s bangs in one of my bentos. I called that one a challenge because I used tomato skin for the bangs, and it was very difficult to cut. Also, a well-planned design should be ready at night. I draw my designs at night and label everything as to what I’m going to use for each part. If I’m not sure how it looks, I sometimes colour my design. So come morning, I know exactly what to do and what I need for my bento.  

3.) Where do you find inspiration for your intricately designed bentos?  
- There are dozens of bento makers on the internet. I get inspiration from them. I also get ideas from the kid’s toys, books and other stuff. When I’m out and I see something cute, it automatically becomes a part of my bento list. J I am always on the lookout for ideas. Everything becomes an inspiration.  

4.) What are the essential props and where do you get them? 
- The most common bento items that are needed are lunchboxes of different shapes and sizes, rice mould, food cutters, dish cups, and food picks. Locally, I get them from Japanese stores like Daiso, Japan Home and Saizen. But since there isn’t much bento supplies found here in the Philippines, I bought a few online from Bento sites.  

5.) What kind of food do you include in your bento? Is the food temp still a concern for you/your kids? Do they take their food hot/warm/cold? 
- There are a variety of foods that can be included in a bento. Mine consists of some part meat like tender cuts of chicken, beef and pork , seafood like shrimps and fish, vegetables ( beans, broccoli, cauliflower, corn, etc.), pasta ( not tomato based ), egg, fruits and a little sweet treat. The kids take their food in room temperature. Since I make it very early in the morning, the heat doesn’t last till lunchtime. It’s a good thing that the kids are already used to taking their lunch in this temp even before I started doing bento lunches. Actually, bento lunches can be heated on a microwave oven but the school canteen has no provision for that.  

6.) Are your kids the envy of the lunch room? How do they show their appreciation?
 - Haha! Yeah, they are already the talk of the school canteen. J Some teachers take photos of their lunch box. Even if it’s not my schedule to make bento lunch, the kids ask if I could make again the following day because their teacher will take some photos. The kids love their bento lunches and they show me their appreciation by “trying” to finish it. And I can see also that they are more open now to trying out new food. They make me happy when they say they’ve finished their veggies or even simply by trying out a slice of carrot. My daughter learned to eat fresh lettuce too, even if I just used it for lining the lunchbox. Kidding aside, they remember to bring back my decorative props and not give it out to their friends. Haha!
 

Che, this post serves as a reminder that Iam waiting for your tutorial on DIY Bento Lunch.

Thanks for reading "Our Phenomenal Life." If you subscribe to the blog via RSS feed or via email, you'll get new posts sent straight to you, for free!  Like this post? Subscribe here.

Tuesday, May 1, 2012

A Passion for Pink {Crepe Paper Curtains}

We have all done crepe paper crafts at some point, mostly during our grade school days.   So when the recent opportunity arose to decorate B's Crafternoon party with crepe paper curtain in gradient shades of pink, I was delighted!  The wonderful ombre effect made by combining white, light pink and fuschia pink made it easy for me to convince the 2 girls of how fun making crepe paper curtains can be!
 
It is really a simple process of cutting, lining up, cutting, lining up...

Here is the step-by-step guide on how I did it.


Monday, April 23, 2012

DIY: Kokeshi Fashion Bookmarks

One of the paper crafts I prepared for B's crafternoon party was fashion paper bookmarks.  It is a project that is easily adaptable if you have an afternoon with your kids this summer.  I will share with you the easy steps on how to make your own bookmarks made out from up-cycled materials.
It is sure to be a hit with your little fashion designers, and what makes this even more of a hit is that it is simple enough for the young ones to do on their own.  And as if that were not enough, the adults would love this project to bits as the materials needed are already available in your home - even right this second!  
 
Fashion Bookmark #1:
You will need:  cardstock paper, magazine cutouts, cutter/scissors, glue.

1.  First, you need to draw a layout of the kokeshi doll on paper.  Make sure that the "dress" is big enough to serve as a canvass.  Since I was doing this for a craft party, I decided it would be easier to just do a one digital pattern and mass-print it outAlternately, feel free to draw out the outline of the dress freehand, the facial features can be drawn using a fine-tipped pen, the hair can be colored in using markers.

2.  Using a sharp cutter/scissors, cut out the outline of the "dress."


3.  The next step would be to scan through back issues of fashion magazines and cut out boldly-colored and strongly-patterned pages.  Sort out the clippings, and group according to color or pattern


4.  Now, unleash the creativity, and mix and match the bits of papers to come up with your very own fashion creation!  The resulting work can be something simple...

Or it can also be an elaborate mix of patterns

Fashion Bookmark #2:
You will need:  cardstock paper cut-out to the following shapes; dress shape, circular shape for the face and a semi-circle for the hair, paper puncher cutouts, cutter/scissors, glue.
And so nothing is wasted, the paper cut-outs that was taken out (the dress outline) can be made into still another kind of bookmark.

Fashion Bookmark #3:
You will need:  used envelope corners, nice graphics cut-out from magazines: 


1.  cut-out a corner from a used envelope
2.  glue the entire surface
3.  stick template/magazine cut-out onto the glued surface.
4.  press firmly together until glue dries up completely.

Happy crafting!


Friday, March 23, 2012

A CRAFTernoon Party

Warning:  photo-heavy post.:)

B's CRAFTernoon party last weekend was over the top girly!  With kokeshi dolls, pink paper lanterns, and pink crepe paper curtains!   Blush pink, coral, watermelon, honeysuckle...  It was her birthday wish come true! 

Even the cookies are sprinkled with strawberry drops and fairy dust....
Since the birthday girl loves pistachios and dark chocolates, I also prepared cookies with white choco discs with sea-salt roasted pistachios and dark choco discs with roasted almonds.

The birthday cupcakes are another special request by the birthday girl:  Carrot cupcakes with Goji berries and dark chocolate cupcakes.  The Goji berries are a variation from the usual raisins that we find in carrot cupcakes.  Although usually used in Chinese savory dishes, it is naturally sweet and adapts itself perfectly well to B's favorite cupcake.
I enjoy preparing simple and intimate birthday parties for the kids, where most of the party decor are mostly DIY, and the guest list is whittled down to just a handful (literally - I just had her choose 10) good friends.  While I want my kids to remember their birthdays as fun events, I do not want them to associate parties with extravagance... so I always make an effort to inject their parties with DIY creativity - from the decor to the activities.

Making the crepe paper curtain was one craft party in itself!  While J and I took to our tasks seriously, B kept herself busy playing with the finished curtains, parading around with the curtains around her shoulder like a beauty pageant sash....

Setting up a DIY party, no matter how small the guest list, is always a tedious task so an extra pair of hands is always useful! The birthday banner is recycled, having used it here and here.  I just updated by printing some new graphics to make it tie-in with the rest of the theme.

And since this is all about B, she has her favorite crafts all lined up on the crafts table.  I had a craft table set-up on one end of the room, at the opposite end of the food buffet table.  The girls all had their own craft kits bundled up in a cute feline princess box.  I printed out the instructions for each craft and lalid out some samples to inspire and guide them.
I purposely wanted to show my 2 girls that our own individual creativity is boundless, and is not limited by the luxuriousness of materials.  I intentionally prepared crafts that would utilize materials that are readily available at my home: colorful board paper, craft embelishments like sequins and feathers, toilet paper rolls, magazine cut-outs, used envelopes, etc.   Do not be fooled - inspite of the materials being readily on hand, it still took quite an effort and took a LOT of my time preparing the craft kit for all ten girls.  Truly, it is a labor of LOVE!

The crafts are all carefully selected by me to maintain the kokeshi doll theme of the party, while at the same time I also wanted the crafts to be useful for the girls when they take it home.
{bookmarks made out of a printed kokeshi graphic and envelope corners}

{ hairclip and headband organizer made with toilet paper rolls and ribbons}

{kokeshi doll bookmarks fashioned from magazine cut-outs}
Here are some of the designs that the girls made

Even the boys at the party had a wonderful time doing something crafty with colored sands.

Happy Birthday, B!  Do know that you are extremely LOVED!